A damp wall is more than just an eyesore. If left untreated, excess moisture can lead to mould growth, peeling paint, unpleasant odors, and even structural damage.
Many homeowners focus on hiding the signs of damp, but the real solution is identifying the cause and drying the wall properly.
In this guide, you’ll learn how to dry out a damp wall quickly and prevent the problem from returning.
What Causes a Damp Wall?
Before attempting to dry a wall, it’s important to understand where the moisture is coming from.
Common causes include:
- Condensation
- Plumbing leaks
- Roof leaks
- Rising damp
- Blocked gutters
- Poor ventilation
Drying the wall without fixing the source of the moisture will only provide a temporary solution.
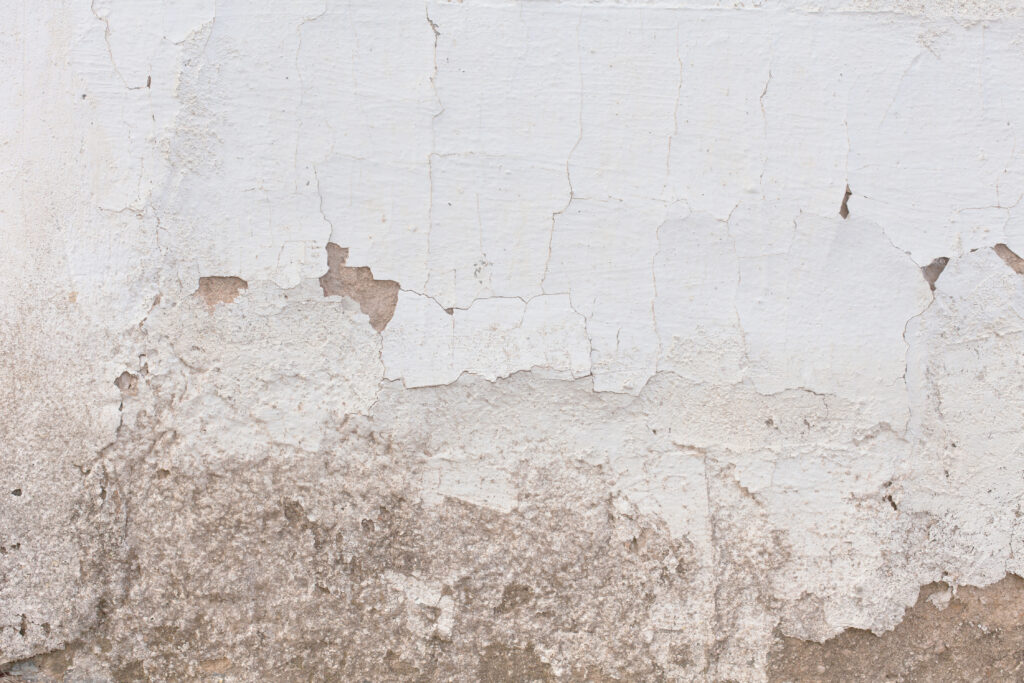
Signs of a Damp Wall
You may have a damp wall if you notice:
- Dark patches on the wall
- Peeling paint
- Bubbling wallpaper
- Mould growth
- A musty smell
- Cold or wet surfaces
The earlier you address these signs, the easier the problem is usually to fix.
Step 1: Identify and Fix the Source
Before drying the wall, locate the source of the moisture.
Check for:
- Leaking pipes
- Roof damage
- Condensation issues
- Blocked gutters
If moisture continues entering the wall, it will remain damp regardless of your efforts.
Step 2: Improve Ventilation
Fresh air helps remove moisture from the room.
To improve airflow:
- Open windows regularly
- Use extractor fans
- Keep vents clear
- Allow space between furniture and walls
Proper ventilation is one of the most effective ways to reduce damp problems.
Step 3: Use a Dehumidifier
A dehumidifier can significantly speed up the drying process.
These devices remove excess moisture from the air and help prevent mould growth while the wall dries.
For best results, place the dehumidifier near the affected area.
Step 4: Increase Air Circulation
Fans can help move air around the room and accelerate evaporation.
Position a fan so that air flows across the damp wall rather than directly into it.
Combining a fan with a dehumidifier often produces the fastest results.
Step 5: Remove Damaged Materials
In severe cases, damaged wallpaper, loose plaster, or peeling paint may need to be removed.
These materials can trap moisture and slow the drying process.
Only carry out repairs after the wall has completely dried.
How Long Does a Damp Wall Take to Dry?
Drying times vary depending on:
- The severity of the damp
- Wall construction
- Room temperature
- Ventilation levels
- Humidity levels
Minor damp patches may dry within a few days, while more serious moisture problems can take several weeks.
How to Prevent Damp Walls in the Future
You can reduce the risk of future damp problems by:
- Improving ventilation
- Fixing leaks promptly
- Maintaining gutters
- Monitoring humidity levels
- Addressing condensation quickly
Preventative maintenance is usually far cheaper than repairing extensive water damage.
When to Call a Professional
You should consider professional help if:
- Damp keeps returning
- Mould spreads rapidly
- The wall remains wet for weeks
- Structural damage is visible
A professional inspection can identify hidden moisture sources that may not be obvious.
Final Thoughts
Drying out a damp wall requires more than simply waiting for the moisture to disappear.
By identifying the source of the problem, improving ventilation, and controlling humidity, you can restore the wall and prevent future issues.
Taking action early is the best way to avoid expensive repairs and maintain a healthy home.